The HP65 Emulator has a number of extra functions available. You can access these from the menu and you can get to the menu by tapping the display.
 Click here on the emulator.
Then you’ll see the following:
Menu
 As you can see, the options are: Stack, Data, Program, Advanced, Help, About, and Back.
Back
Let’s get the easiest one out of the way first. “Back” takes you back to the calculator display.
Stack
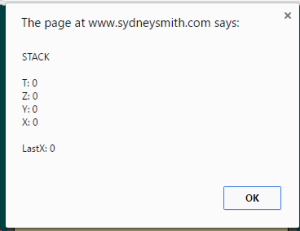
“Stack” shows you what is in the calculator’s “stack” – the X, Y, Z and T registers; and in the “Last X” register. As explained in The Stack (for the HP21 emulator), there are four stack registers which save intermediate results as you work through a calculation. With the real thing, you could “Roll Down” the X register to see the Y register, and again and again and again to see Z, T, and X once more. With the emulator, just tap the display for the menu then tap “Stack”. You’ll see something like:
Data
“Data” shows you what is stored in the data registers. The HP65 calculator has nine data registers. You can store numbers in registers 1 to 9 by pressing [STO] [1] through [STO] [9]. Later, when you want the number back just press the matching recall buttons ([RCL] [1] through [RCL] [9]). The “Data” menu option shows you all of the data registers at once. It looks like:
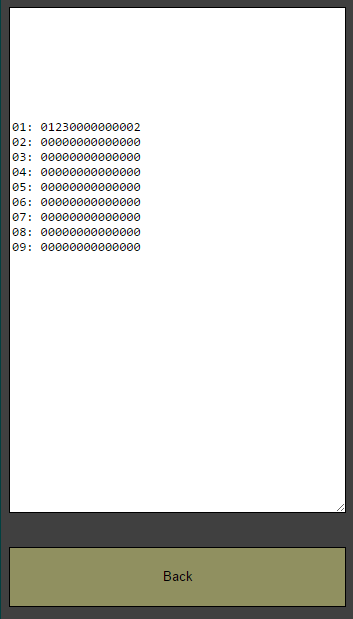 This shows you the register number and the content for each of the registers 1-9. However, there is a catch. It shows you using the calculator’s own internal format – binary coded decimal (BCD).
It isn’t hard to understand especially if you understand scientific notation. The numbers are stored in scientific notation. There is a mantissa in the first 11 digits and an exponent in the last 3 digits. The actual number is (mantissa) * 10 to the power of (exponent).
2 exponent 3 is 2 * 10^3 = 2 * 1000 = 2000.
The first digit of the mantissa and of the exponent is the “sign”. If it starts with “0” it is a positive number. If it starts with “9” it is negative.
Shown in register 01 is mantissa 01230000000, exponent 002.
This is +1.23 * 10^+02 = 1.23 *10^2 = 1.23 * 100 = 123.
It isn’t the easiest thing to follow but it’ll make sense to you eventually. It does help show what’s going on inside the calculator.
Program
Pressing “Program” shows you this:
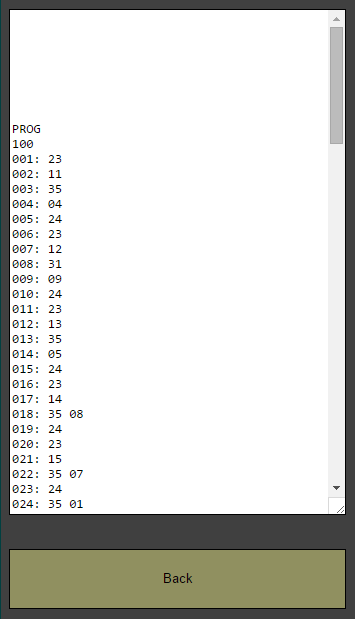
This is a match to the format used in the HP67 emulator and that used for the “magnetic cards” in the HP65 and HP67 emulators.
The first line says “PROG” and is followed by a number. This tells the emulator that the information gets loaded into the calculator’s program memory. This is rather obvious for a HP65 as it only loads programs from magnetic cards. However, the later model – the HP67 – allowed loading and saving DATA as well as PROGram information. If a card starts with PROG it will be loaded into HP65 program memory. The HP65 ignores any section starting with DATA.
The number after “PROG” is important. It tells the emulator how many program lines follow. In most cases on the HP65 emulator this will be “100”. The HP65 is limited to 100 steps and the emulator follows this rule. You can’t change this number and load 200 program steps. You can however, use a number less than 100.
After the number is the actual program steps. These are in keycode format (eg 31 for the [f] key – 3rd row, 1st column on the keyboard). Keycode format is not what the calculator uses internally but it is what it displays when you re in W/PRGM mode. It is also what most HP65 program listings use. I chose this format to make it as easy to understand and use as possible. Internally, keycodes are converted to program codes by the calculator. (The details are given in HP65 Program Codes.)
The screen you see is read/write. This means you can change the program and have your changes loaded back into the calculator’s program memory. The intent here is to allow you to copy and paste “magnetic cards” to normal text files if you like. Normally magnetic cards are stored within your browser’s “local storage” mechanism. This is very safe for web browsing; but cumbersome if you want to share a program or use one in a different browser. The Program menu option makes this easier for you.
You can also copy and paste a HP65 program listing from any other website into the text box. The line numbers shown are for your convenience. They don’t have to be present when you paste something in.
If you change a program, make sure the number of lines remains the same (or change it to the correct number).
Program (Part 2)
If you scroll down further, you’ll see:
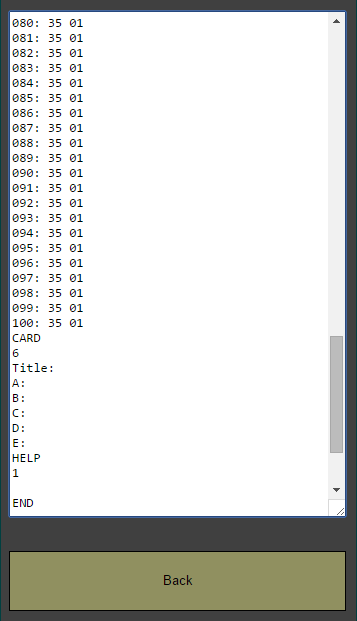
The section after line 100 says “CARD” and has 6 lines.
The first line is the card title. This gets written at the top of the mag card. If you had a real HP65 or HP67 with a card reader you’ll already know that after you’ve loaded the card you slide it in the slot above the card reader. That way the card sits above the [A] to [E] keys and labels them. The “Title” is the name of the program. An example is the old “Moon Lander” program.
Leave a space after the colon (:) and then type in a program title.
The next five lines are labelled “A:” through “E:”. These are labels for the matching keys. What you type here shows up above the relevant key when you slide the card into the top slot. To continue with the “Moon Lander” example, [A] was labelled “CNTRL” and [B] was labelled “RESTART”. In this case you’d use:
A: CNTRL
B: RESTART
and leave the others blank.
When you load the card into the calculator, it looks like:

In this case you can see that RESTART doesn’t quite fit. The writing on the real cards that were printed by HP was a little smaller than what I’ve used.
There is another section after “CARD” called “HELP”. By default, it has only one line and the line is blank.
If you want to include instructions for how to use your program and maybe more information about what the [A] to [E] keys do, you can add lines of text here. You can change the “1” to be as many lines as you need.
Normally, when you choose “Help” from the menu, it takes you to the calculator’s help page on the website. However, if a mag card has been loaded and it has something in the HELP section, that information gets shown instead.


I just sent for the CD of the emulator. I’m using Linux Mint. Will it function on Linux? The blue subscripts at the bottom of the hp 65 keys are unreadable on my screen. Can you supply a better photo to show these?
Victor Misek
Hudson, NH
Hi Victor,
Thank you for your purchase.
It should work on Linux Mint. I had a Linux laptop for a while and it worked fine on that (Lubuntu with Chrome). You should be able to try it out before purchasing by clicking on the “use” or “install” links. If they work for you, all should be fine.
The picture gets scaled to your screen size. The original is 547×1024 and you can download it from products/gss-hp65/run/images/face.jpg. (You’ll also have a copy on the CD). Open it in an image viewer and adjust the zoom for best possible reading of the keys. I don’t have a better version. This is the best I could find, within the limits of copyright, with straight sides and a tilt so the blue labels are visible.
There seems to be an open-out page for page 4 of the Owners Handbook and that details the keys. I have included a copy of part of that page (intended as fair use for educational purposes) as products/gss-hp65/downloads/65-blue-keys.png. That reasonably clearly shows the keys as:
g ENTER, CHS, EEX and CLx gives DEG, RAD, GRD and DEL
g 7, 8 and 9 gives x<->y, Rv and R^
g 4, 5 and 6 gives 1/x, y^x and ABS
g 1, 2 and 3 gives NOP, pi and n!
g 0 and “.” gives LstX and DSZ
I hope that one of the above two photos and/or the above explanation helps.
and I missed another row of blue keys:
g DSP GTO LBL and RTN gives x!=y, x<=y, x=y and x>y